The DataSonifyer is a tool that allows you to transform data sets - i.e. numbers - into sound: This is called data sonification. Since there are endless ways to represent data as sound, DataSonifyer offers many ways to make your data audible.
1. Load, Play, Stop, Record

You can load datasets using the Load Data button: There is a separate article on this. In the top right corner, there are three buttons that work like any other music tool: "Play, Stop and Record. Play" plays your sonification, and "Stop" stops the sound.
If you want to record your sonification, click on "Record". Now the button shows "Recording": DataSonifyer is now ready to record. Then click on "Play" and the DataSonifyer records what is being played. When the sonification is finished or you clicked on "Stop", press the "Record" button again to stop the Recording.
2. The visualisation

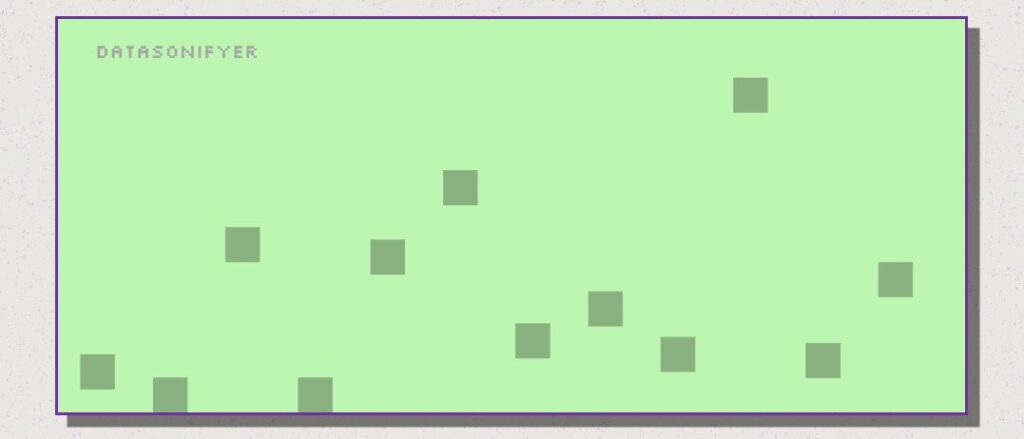
DataSonifyer is primarily a sound tool - but the visualisation (the green canvas) gives you an indication of what your data looks like. As soon as you have successfully loaded a data set, the first column of the data set in the "Frequency" module is automatically selected and visualised. The data is displayed as you know it from visualisations: one rectangle per data point and the higher the data value - and the higher the sound, the higher the rectangle. The volume is shown with the transparency of the rectangles: The louder, the more a data point is visible. The length ("envelope") of the tones is represented as the length of the rectangles: The longer the tone, the longer the rectangle. In this version, effects and filters are not displayed graphically.
If you have clicked on "Play", the data point currently being played will always be highlighted in red in the visualisation.
3. Sound settings

Below the visualisation you will find four general setting options: Sound, BPM, Loop and Shuffle.
- At "Sound" you can choose how you want your sonification to sound. There are several synthesizers and a noise generator available. Experiment to see which sound suits your sonification best. For example, you can use filters to make the sound softer or brighter. You can control the pitch of the sound in the Frequency sound module. You can create many other sounds with the Noise Generator, for example, by creating short or long sounds with the Envelope module and shaping them with filters to fit your data.
- BPM is the speed at which you want your sonification to play. "BPM" means beats per minute, i.e. the number of notes played per minute. A BPM value of 60 means that 60 notes are played per minute, or exactly one note per second. A BPM value of 120 means that 120 notes are played per minute, or two notes per second. The higher the BPM, the faster the sonification. The BPM value also affects your input in the Rhythm module.
- "Loop" lets you choose whether your sonification is played once ("Loop": "Off") or repeated over and over ("Loop": "On").
- The Shuffle box allows you to shuffle your data series like a deck of cards. You can do this just for fun, or you can use it with the Rhythm module to sonify distributions.
4. The Sound Modules

Below you will find the sound modules: These are the most important instruments in DataSonifyer, because they allow you to choose which of your data you want to display as a sound: Do you want your data to be heard as pitch? Or as volume? Or as a rhythm? Or as tone length?
DataSonifyer has a module for each musical value: pitch ("frequency"), volume ("amplitude"), "envelope" (the length or outer shape of the sound), "rhythm" (the note values, i.e. the time interval between notes). There are also two other modules that you can use to make your sound more exciting: Filters and Effects. In each module, you can specify if and which column of your table should be converted into the musical value. You can also specify between which musical minimum and maximum values your data should move. You can also manually set the minimum and maximum values for your own data (if you don't want to use the automatically detected minimum and maximum).
5. Import, Export

Below you find three more buttons: "Add Sound Modules" allows you to add more sound modules. You can activate or deactivate as many modules as you like by clicking on "Add Sound Modules" at the bottom left. A window will open where you can select the different modules. Select the desired modules and click "Save".
DataSonifyer stores all data locally in the browser. Advantage: the tool is very privacy friendly. The downside is that as soon as you reload DataSonifyer, everything you have edited is gone. However, you can download your work by clicking on "Export Preset" at the bottom of the window. A JSON file containing your work will now appear in your download folder. The next time you click 'Import Preset', you can load this file into DataSonifyer - and continue sonifying where you left off.
By the way, these files can be loaded into DataSonifyer by anyone: if you want to share your sonification with others, simply send this JSON file and others can load it into DataSonifyer in their browser and listen to your sonification.
6. Recordings

Once you have recorded a sonification, another green box will appear below with your recorded sonifications. This is where you can download your sound and edit it using Audacity for example.

